How Soundproofing a Van Conversion Works
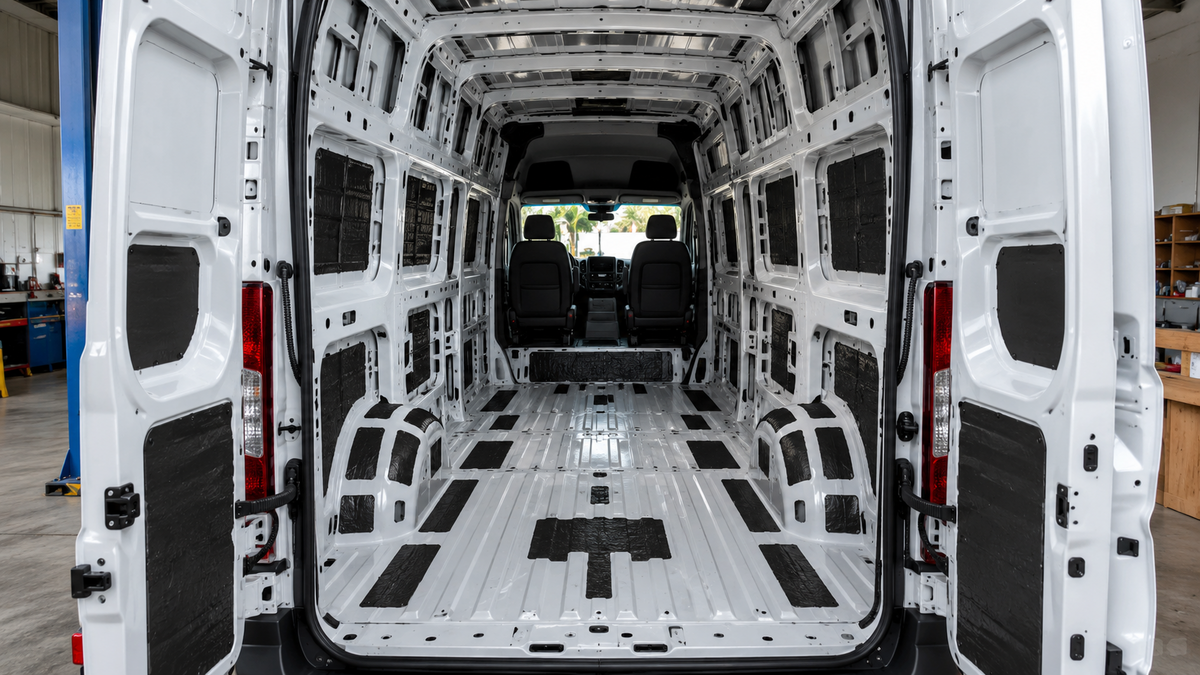
An untreated cargo van is built from large metal panels that vibrate and resonate while driving. Road noise, tyre contact, and panel flex all feed into that. Soundproofing a van conversion is not about covering every surface with the same material. The noise sources are different, the surfaces are different, and the treatments are different. Getting the result right means matching each treatment to its problem and placing it at the correct build stage.
Is Sound Deadening Worth It in a Van Conversion?
Yes, for most builds. Adding vibration-damping material to bare metal panels reduces resonance, lowers driving noise, and gives the interior a less hollow feel. The van becomes more comfortable to spend time in.
Results vary depending on the van, the treatment method, and how much of the conversion is complete. Sprinter van panel resonance is one of the more common complaints from owners who convert without addressing the bare metal first. In any cargo van platform, the large unsupported body panels are the primary source of vibration-driven noise.
Sound deadening is most effective when applied at the right stage. Material added after floors and walls are installed is either inaccessible or requires costly retrofitting.
Soundproofing vs Sound Deadening vs Insulation
These terms are frequently used interchangeably. They describe different treatments with different functions.
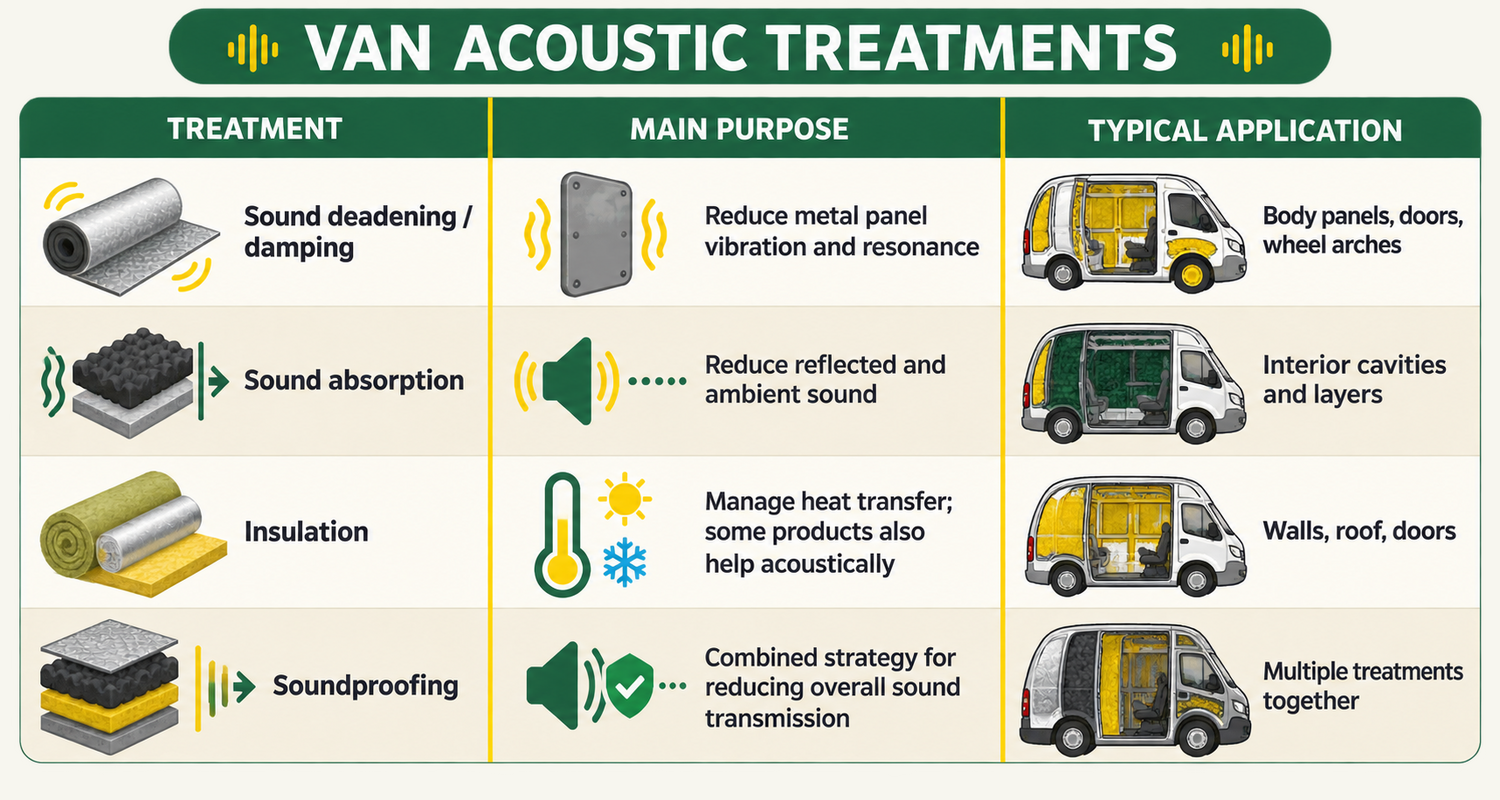
Insulation and ventilation address heat transfer as their primary function. Some products also contribute to sound absorption. They do not replace vibration damping.
Effective soundproofing of a van conversion combines vibration damping and insulation at minimum, with acoustic absorption where appropriate. Each treatment solves a different part of the problem.
Where Should You Put Sound Deadening in a Van?
Treatment is most effective when placed purposefully rather than uniformly. More material is not automatically better.
Wheel Arches
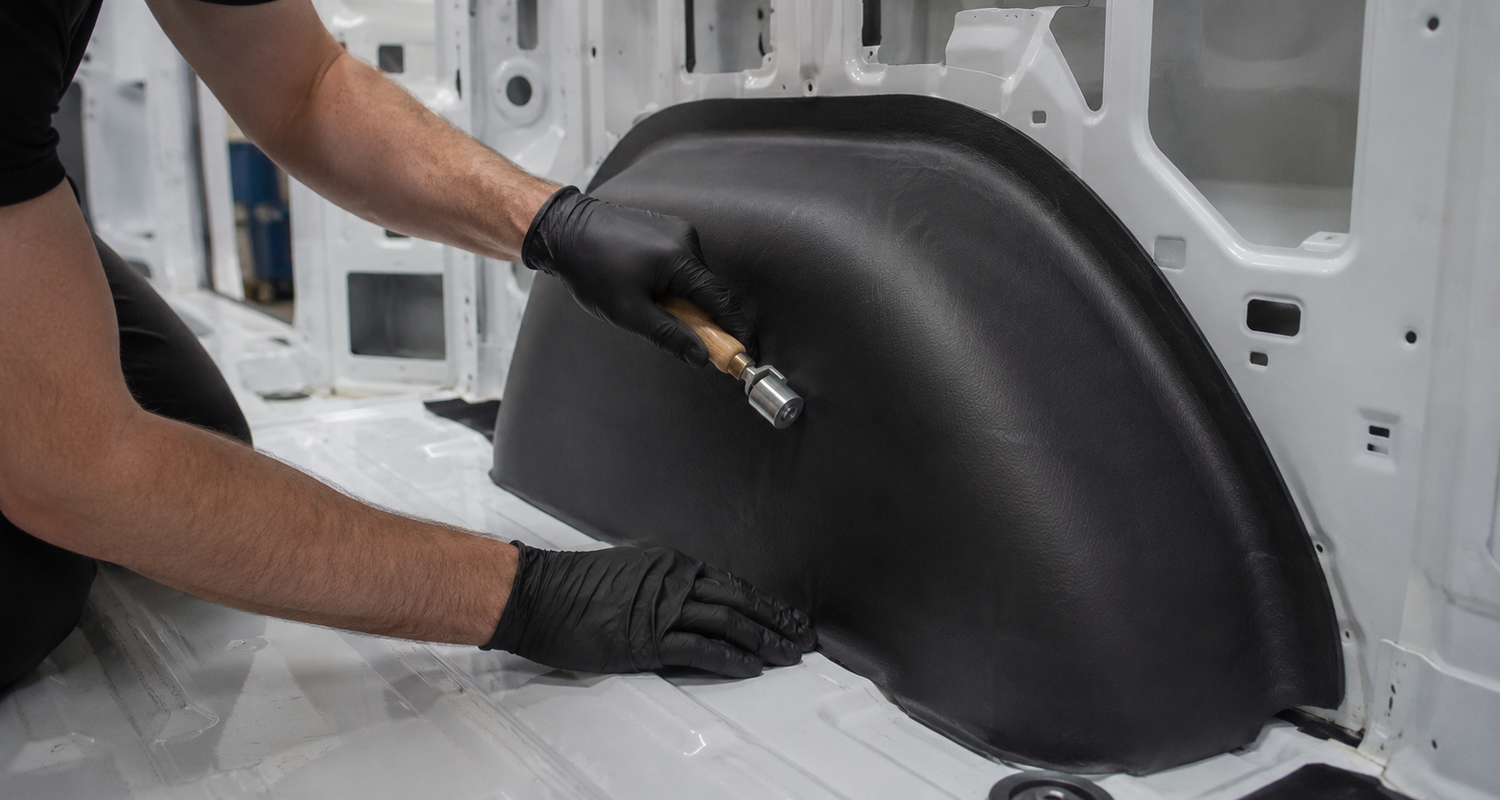
Wheel arches sit directly above the tyre contact patches and take the most direct road noise impact. They are among the highest-return areas for sound deadening in any van conversion. Wheel arches and undercarriage panels flex under load and transmit road surface noise through direct contact. Treating them early, before any liner or flooring is fitted, is the correct sequence.
Large Body Panels and Doors
The side walls and rear doors are built from large unsupported metal sections. These vibrate at low frequencies and create the characteristic hollow resonance of an untreated cargo van. Damping mats applied to the centre of these panels reduce their natural frequency and flatten the resonance. Full coverage of every panel is rarely necessary.
Floor and Roof
The floor sits over the road surface and takes significant noise input from below. Floor damping sequence before adding subfloor and insulation layers is a consistent recommendation from experienced van builders. The roof transmits wind and rain noise and benefits from similar treatment. Both surfaces are part of the complete acoustic envelope.
Best Materials for Soundproofing a Van Conversion
Material selection should match the problem being solved.
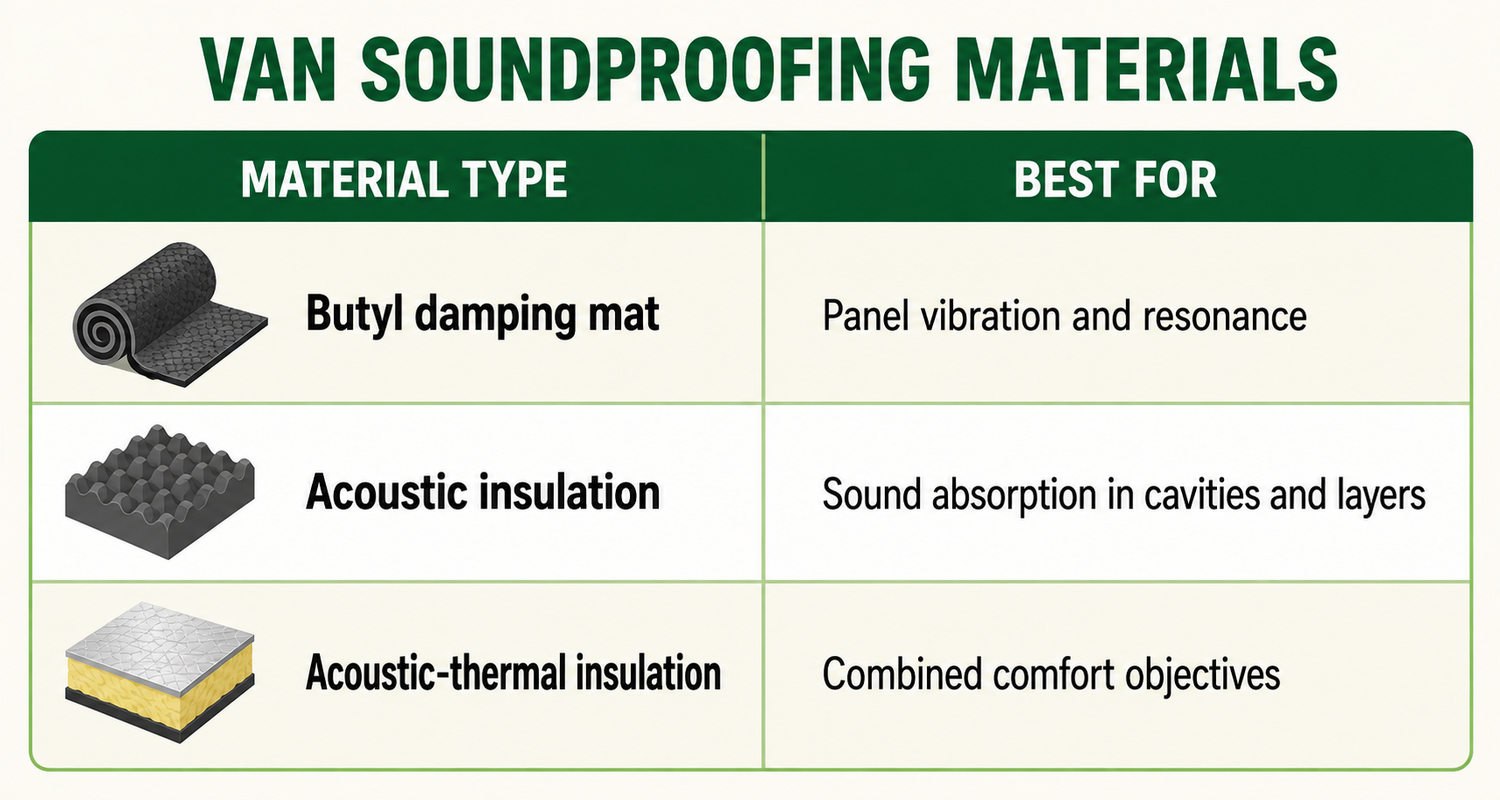
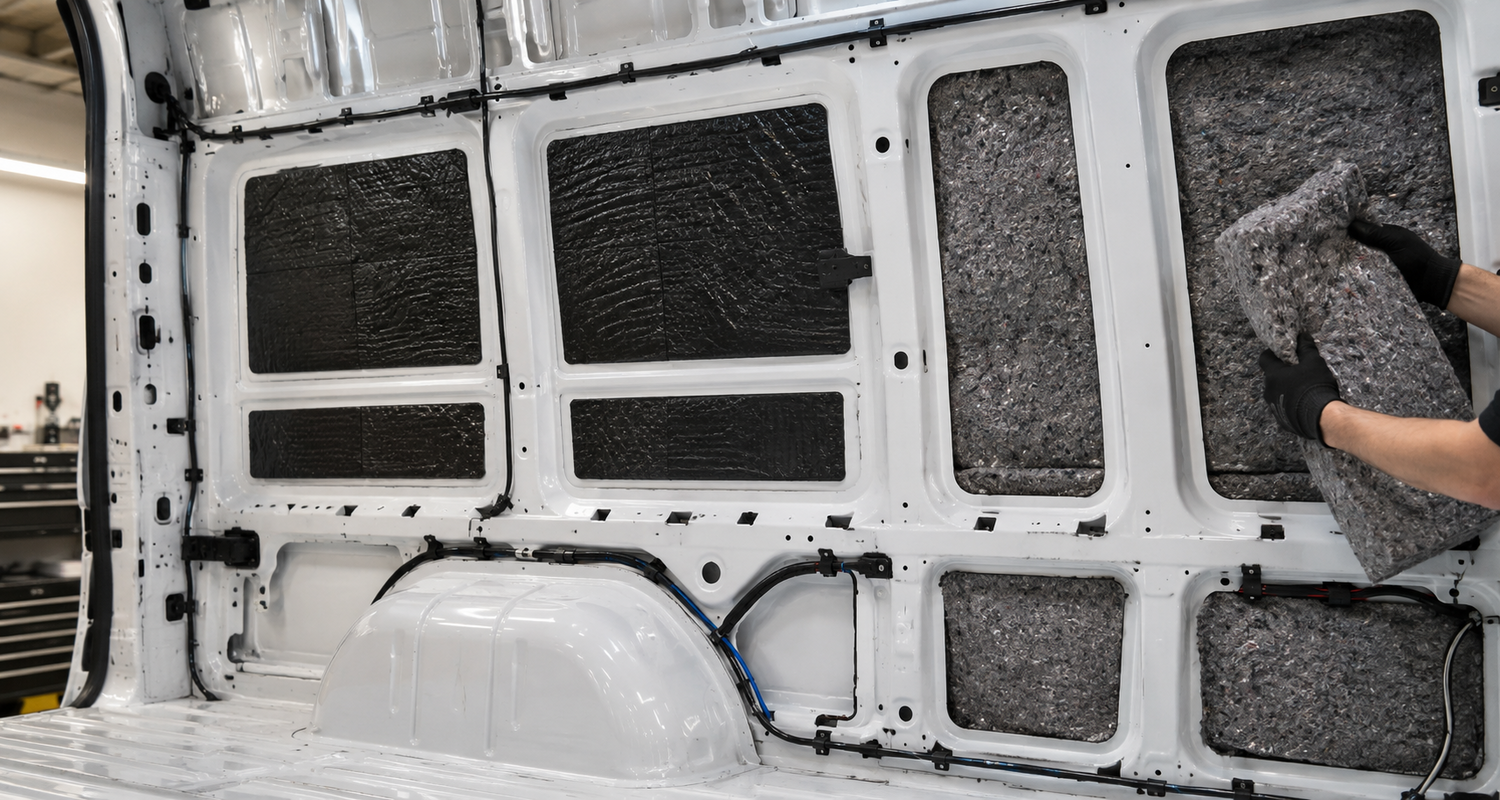
Butyl rubber for damping is the standard choice in automotive applications. It is dense, self-adhesive, and effective at reducing low-frequency panel resonance when applied directly to bare metal. Foam-based materials serve a different function. They absorb airborne sound rather than damping structural vibration.
Product thickness, weight, and compatibility with adjacent layers matter as much as material type. Heavy sound deadening on every surface adds meaningful weight to the van. Material that must be removed to access wiring or structural elements later represents a planning failure.
DIY vs Professional Van Soundproofing
DIY damping mat installation is straightforward on accessible panels. Cut, peel, apply, and roll. It is a practical entry point for builders with time and basic tools.
The limitations appear at the system level. Professional conversion builders coordinate sound treatment with thermal insulation, electrical routing, flooring, and wall cladding as a single planned sequence. The acoustic layer is installed at the correct stage. It does not need to be removed to access other systems later.
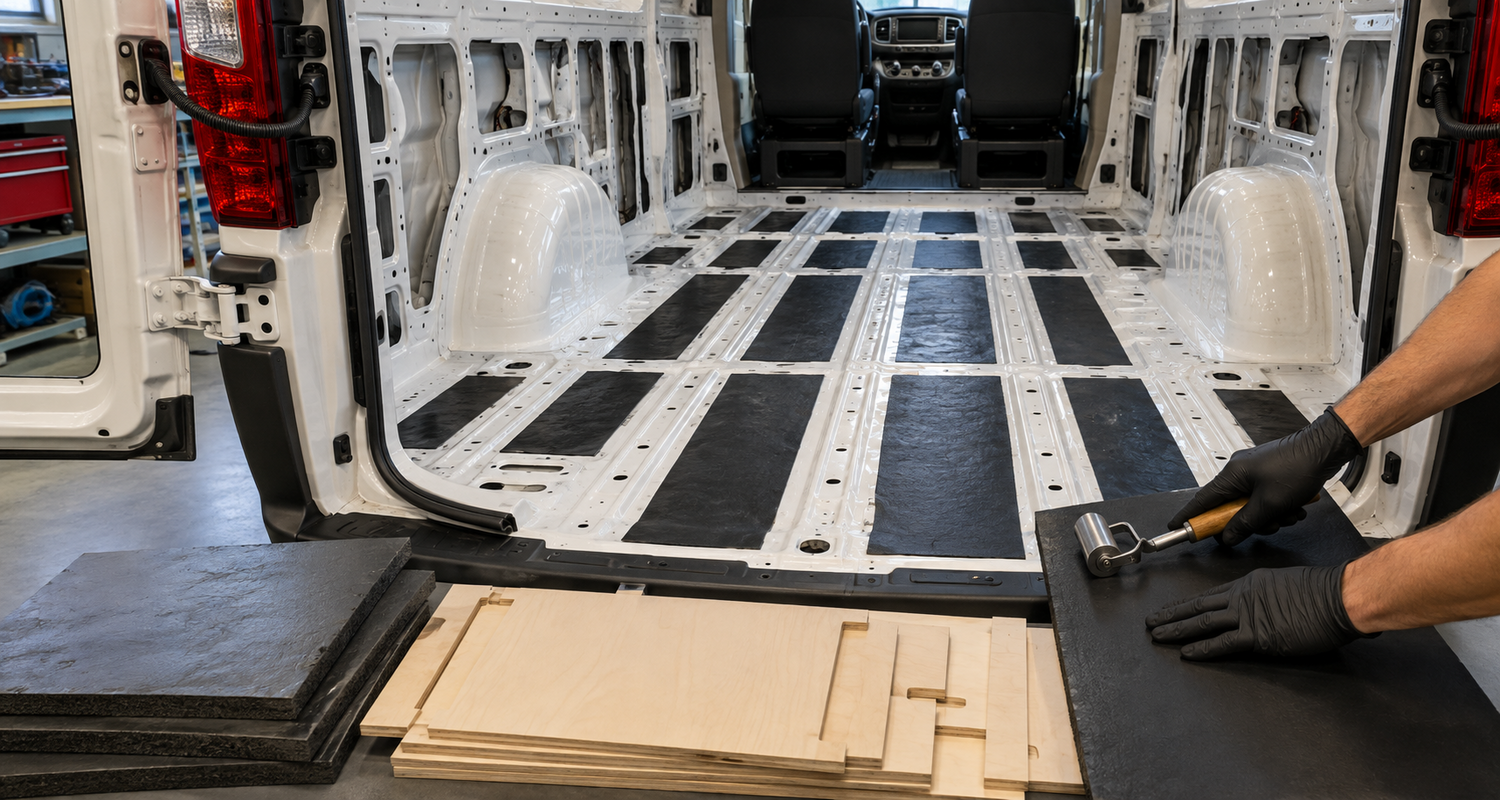
Professionals also identify which areas deliver meaningful acoustic return and which add weight without proportional benefit. Strategic placement produces better results with less material.
Once floors, walls, and cabinetry are in place, retrofitting sound treatment becomes significantly more difficult. Planning it into the original build is the correct approach.
How to Plan a Quieter Van Conversion
Follow this sequence before materials are selected for soundproofing a van conversion.
Identify the primary noise and vibration sources for the specific van model.
Determine which panels require vibration damping based on surface area and location.
Select acoustic and insulation layers for each surface.
Plan treatment before flooring, walls, and cabinetry are fitted.
Consider weight, space, and thermal performance together.
Integrate treatment into the complete build sequence.
Bare metal preparation before soundproofing includes cleaning, treating any surface rust, and addressing drainage. Damping material applied over contaminated or corroded metal will not bond or perform correctly.
Mango Vans designs and builds custom Sprinter, Transit, and ProMaster conversions out of South Florida. Sound management, insulation, and interior construction are integrated into the complete conversion plan from the start. See the completed builds gallery to see how full conversions are specified and built.
Frequently Asked Questions
Is sound deadening worth it in a van conversion?
Yes. It reduces panel vibration, lowers driving noise, and improves interior comfort. Results are best when treatment is applied to bare metal before flooring and walls are installed.
Where should you put sound deadening in a van?
Wheel arches, large body panels, doors, floor, and roof. These are the surfaces with the most direct road noise exposure and the most significant vibration under normal driving conditions.
How do you make a camper van quieter?
Combine vibration damping on bare metal panels with acoustic insulation in the cavities and layers above. The two treatments address different problems and work best together.
What is the difference between sound deadening and soundproofing?
Sound deadening refers to damping materials that reduce panel vibration. Soundproofing is the broader strategy of reducing overall sound transmission, which typically involves damping, absorption, and insulation in combination.
Do you need both sound deadening and insulation in a van?
Yes, for most builds. Insulation manages heat transfer and provides some acoustic benefit. Sound deadening mats manage panel vibration. They solve different problems and are not substitutes for each other.
What is the best material for sound deadening a van?
Butyl rubber damping mats are the standard choice for reducing panel vibration. For sound absorption in cavities, acoustic insulation serves a separate purpose. Material selection should match the specific problem being treated.